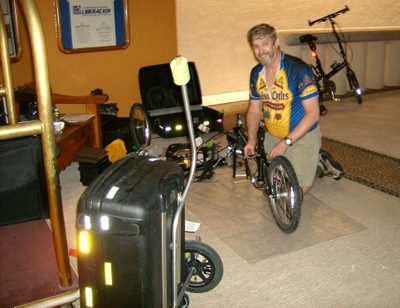
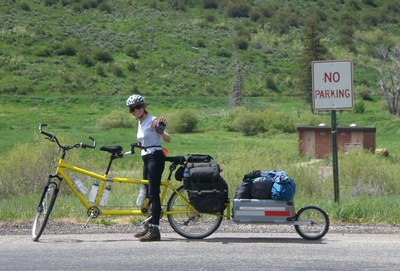
General Bicycle Packing/Shipping Checklist,
Bicycle Disassembly/Reassembly Checklist,
Cycle Packing/Shipping Checklist,
Bike Packing/Shipping Checklist,
v05

These Instructions are optimized for an 'on the ground' bicycle disassembly/assembly for airline transport or freight shiping purposes. If a cyclist gets a chance to use a bike stand then take advantage of the opportunity.
Looking for what items to bring on a Bicycle Travel Tour or a Bicycle Camping Tour?
then go to the Bicycle Touring Checklist
Just Before Bike Break-Down:
- Muddy Bike? A big muddy cleanup may be needed. If needed, consider borrowing a water hose or visiting a car wash or a creek. If nothing else consider using your water, water bottles, and a rag.
- Wet Bike? Always dry the bike when you can. Given enough time spent traveling, everyone is eventually faced with a situation where they have to pack a wet bike. One usually has about 24 hours before rust sets. So make cleaning, drying, and oiling a priority at the destination.
Materials and Tools (Required Beforehand):
- Optional/Reminder: Reading Glasses [from Mavis O].
- Checklist (like this one - it really helps!)
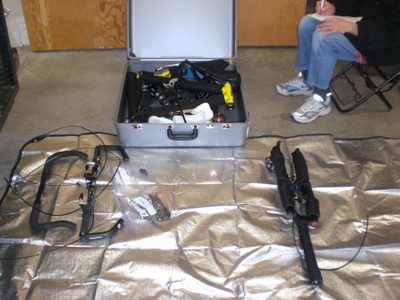
- Plastic Sheet, ~ 8 feet x 8 feet (~2x2 yards/meters) or use a Space Blanket. This also helps to claim/preserve work space when working in a public area (parking lot, dock, depot, terminal, ... )
- Necessary Tools (often found on Multi Tool):
- Phillips Screw Driver (found on most multi tools)
- Flat Screw Driver (usually for accessories, found on most multi tools)
- 3, 4, 5 mm speed hex keys (regular hex keys from 2 to 6, plus 8 mm are found on bigger multi-tools but lack big torque leverage)
- Brake Rotor Hex-Bolt Key (T-25 Torx, one piece, long and short side, or sometimes on multi tool. Remove rotors from wheels for shipping and many potential risks/problems are minimized)
- Open End or Box Wrench 8, 9, and 10 mm (8 mm most common).
- Adjustable Wrench, Small (Notes: Typically range up to 19 mm. Bigger multi-tools have a small variety of common metric wrench sizes, typically 8, 9 ,10 mm. 8 mm is the most common/used wrench size, other sizes may be needed. Pedals are typically 15 mm.)
- Pedal Wrench (15 mm is most typical, size can vary, not needed for quick release pedals but on occasion even quick release sockets are too wide for shipping purposes as they add about one inch width on each side.)
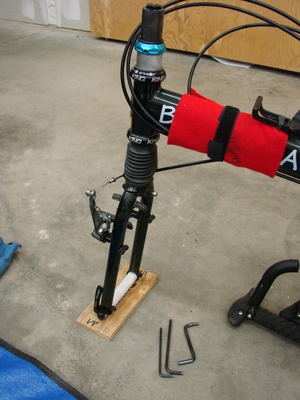
- Plywood Block for fork on ground (3/8" deep, 7"x3"), Block for Bottom Bracket or placing under rear chain stays to keep rear derailer mount off the ground (2"x4", 7"long). Sometimes two blocks.
- Tie Straps (self stick Velcro best, 12 to 15 inches length, .5 to 1.0 inch wide - Available at bigger Cloth Stores in ~3 yard/meter length)
- Black and Grey/Silver Marker Pens (Generally, use black on all colors except black, use grey/silver on black bags/items; handy even after first time). Use as position marker too (in lieu of scribe - scribes are evil, can cause stress cracks under pressure).
- Packing Materials: Combinations of:
- Address Label (Your creation or shippers)
- Cardboard, Corrogated (used for partition or packing protection, Eco Friendly)
- Newspaper (Most common, least expensive, and Recyclable)
- Styrofoam (Please Avoid, NOT Ecology Friendly)
- Peanuts (Please Avoid, NOT Ecology Friendly)
- Bubble Wrap (Reusable)
- Packing Tape, Stronger than Masking Tape. Usually Duct Tape is Perfect. Avoid Box Packing tape on the bike frame or components because the glue comes off as the tape is pulled off.
- Protective Storage Bags (felt or polar fleece insulated type, mark with component name if first time; easily made, buy bulk cloth from Cloth Store). BikeFriday sells some Fleece Bag sizes, ready made, unadvertized.
- Ballistic Nylon Insulated Velcro Wrap (The Best Protection and Most Expensive Choice)
- Plastic zip lock type bags (~2x3 inch, ~6x7 inch, ~10x12 inch [~approximate sizes], in lieu of no small bags, use plastic quart and gallon sized zipper type bags)
- Latex or Nitrile type Gloves for hand dirt/grime/oil protection (Many people are allergic to Latex and don't know about it, Nitrile is more expensive)
- Cleaning Rags (for wiping chains/grease, rings/sprockets/cassettes,
hands; we buy in bulk and carry 6-10 per outing.
Rag Usage Metric: We average one for setup, one for break-down, and one every other day). Very Messy This. - Handy-Wipes (to clean hands, or similar materials)
- Fastener Management:
- Thread Lock (small bottle/tube, light or medium temporary duty, NOT permanent). About Thread Lock.
- Oil (your favorite bike type brand, NOT {WD-40, 3-in-1, sewing machine}). For fine/small threads
- Grease (small tube, bike type). For bigger/course threads.
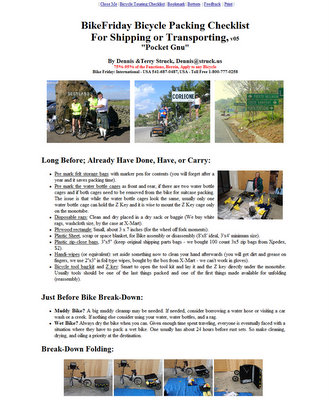
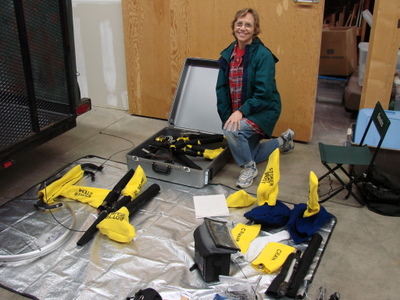
Optional / Tools Specific to Your Bicycle:
- Any tool specifically for your bike, not listed here ___________________
- Any tool used to address a specific ongoing issue with your bike (not listed here)
- Brake Rotor Hex-Bolt Key (T25 Torx, one piece, long and short side, or sometimes on multi tool. Remove rotors from wheels for shipping and many potential risks/problems are minimized)
- Crank Ring Removal/Pulling Tool (This is usually not needed for box shipping but it may be needed for case shipping): The tool size/type varies by bike. Often an 8 mm hex key works, usually the multi-tool 8 mm key is too short for good leverage (but it can be used, it takes force) - consider carrying and using a longer hex key (about 6 to 8 inches long, often available at Pawn Shops as one piece) or else one needs a bike or factory specific tool.
- Plastic (PVC like) narrow pipe, to use as fork shipping/ storage spacer with skewer mounted through. OPTIONAL, pre cut to size, don't over torque with tight skewer.
- Headset Wrench
- Spoke Wrench (different sizes exist, be sure to precisely match your spoke nipple size(s), some bigger multi tools have some spoke nipple wrench sizes. Be cautious about spoke wrench tools with multiple wrench sizes as many nipples get rounded from misuse.)
- Needle-Nose pliers with wire cutter (not quite as good as wire snipper)
- Tongue and Groove pliers (narrow width if possible) very universal, don't cut down length but obtain light weight
- Coupler Tool, one notch spanner for S&S Couplers
- Two Pin Spanner for bike with eccentric bracket(s)
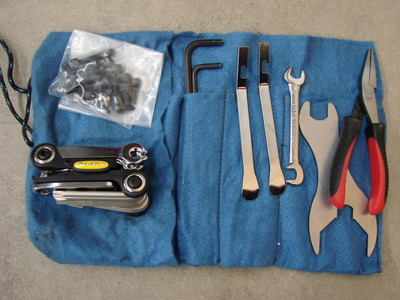
Optional / Increased Bicycle Maintenance Knowledge for the Following:
- Bottom Bracket Tool(s)
- Freewheel Wrench (if appropriate)
- Cone/Axle Wrench (if appropriate)
Before Disassembly:
- Wipe the Bike and Chain Clean! Run the chain(s) through a hand held rag. Wipe the Sprockets too. Clean/wipe anything with grime (avoid allowing anything to have contact with grime/dirt during the packing/shipping process). If not cleaned, Greasy Grime has a way spreading to valuable and hard to wash items
- Set Chain around Smallest Chainrings. This action facilitates two things:
- It keeps the rear derailer from sticking out.
- It allows the most slack in the chain, thus making the chain easier to clean and/or remove.
- Pre-Mark Seat Position, Handlebars (Black or Grey/Silver Marker Pens, avoid the use of scribes as a scribe mark can actually weaken/cause a stress fracture)
- Consider adding tiny marks on cable ends (for some bikes, for realignment of cables if cable have to be removed or if one or more cables disconnect into separate sections).
- Remove Water Bottles (sometimes the water is used to clean the bike)
- Clean bike (if necessary, wipe/dry well, re-oil if needed but wipe clean, only takes 24 hours for rust to set)
- Dry the bike as best you can. If possible, try to take advantage of a mid day warm sun. Sometimes bikes have to be packed wet - it happens. Remember to dry the bike and components at the other side, rust starts to set in at about 24 hours.
- Wipe all grease and oil from all chains and to the best capability cassette and rings
Peripheral Components Removal:
CAUTION: Only loosen bolts and retighten in place once component is removed,
so as to not loose bolts.
NOTE: Always keep spare component bolts (because they do disappear in
transit or while on tour).
- Place plastic sheet on ground (if not already done).
- Stand or lay the bike on the plastic sheet, leaving enough room for you to work on your knees.
- Place the tools, to use, directly below the bottom tube. Knowing which tools to use, comes with experience and varies by bike, but the Packing/Shipping Tools List (from above) contains the most commonly used tools for assembling and disassembling a bike. When through, with a particular tool, place it back to the same spot (below the bottom tube).
Wisdom: It is wise to make the tools the last thing packed and the first thing accessed on the other side of a shipment. While traveling on the bike, always store the tools so that the are easily accessed. - Remove Saddle Bags (other bags may be optionally removed )
- Remove Pedals (wipe off grease after removal, add fresh grease for mounting, left side is left hand thread, right side is right hand thread)
- Remove Handlebar Bag and/or Map Holder
- Remove any Handlebar/Stem Attachments (Travel Computer, Light(s), Bell, GPS)
- Remove Seat Bag, Tool Kit Bag (last thing packed, first thing accessed)
- Remove Seat and Post. Sometimes Seats can stay on the Seat-Post, sometimes they must be removed from the post too. Wipe off grease (from seat post).
- Remove Bottle Cages and Tire Pump Mount (if mounted), re-install bolts to the braze-on's.
- Remove Bar Extension, AKA Lightbar.
- Some racks/fenders cannot be removed/accessed until the wheel is out of the way/removed. IF either wheel does not have to be removed, THEN Remove Racks and Fenders, ELSE Wait until after the wheel removal step below.
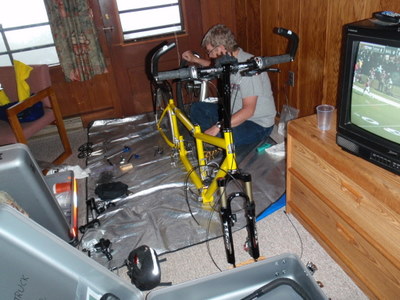
Main Components Removal:
Philosophy: Remove as many bike components from the bike as possible before handlebar and wheels removal.- Recheck/Reset Chain around Smallest Chainrings
- Disconnect Front Brake Cable at Brake Lever. Some bike cables also remove at the brake, most don't. Keep cable out of the way of work.
- IF there are interim Cables, THEN remove the Cables.
- Disconnect Both Brake Cables. Usually this is at Brake Lever but it can be at the Brake. Sometimes the brake cable becomes totaly free, usually not.
- Disconnect Both Shift Cables. Usually this is at the handlebar shifter but it can be at the derailer or midway. Sometimes the brake cable becomes totally free, usually not
- IF there is a Master Link (highly recommended) OR IF the rear derailer cage is open and allows chain removal, THEN Remove the clean drive chain. Place the chain and quick links into a baggie.
- IF the packing container requires Rear Derailer Removal, THEN remove the rear derailer at this time. Wipe clean and store in something that is the consistency of a thick pile hiking sock.
- IF crank removal is required, THEN remove crank (usually not required).
- Remove Front Wheel: Mind the bake disk, pads, or any other fork
mounted device (like a travel computer sensor).
OPTIONAL: Consider adding a fork spacer (narrow plastic plumbers' pipe) mounted by skewer to hold the fork spread and dropout alignment in place.
OPTIONAL: Because some fenders and/or racks require a wider skewer, a second (narrower) skewer may be necessitated just for shipping purposes. Account for optional skewer. Pack skewer into other sock. Set Wheel aside.
OPTIONAL: IF there are two people, THEN one person can hold the bike upright, using a small piece of plywood to protect the fork dropouts. ELSE keep the bike on its side (usually left side). - Remove Rear Wheel:
- Remove rear skewer. Place into skewer storage sock (with front skewer).
- Remove rear wheel WHILE IF the chain is still attached, drape the slack over the chain stay - Mind the brake fit/angle.
- Set Wheel aside.
- IF the chain is on the bike, remove and store in plastic bag.
- IF the Rear Rack and/or Fender is/are still attached, THEN remove. Sometimes the braces must be removed from the fender, sometimes not. Store loose nuts and bolts in plastic bag and snug down bolts on the bike. Set fender and/or rack aside
- Remove Handlebar. Set aside, then snug down bolts or remove and bag them. Here, loose bolts often disappear in shipment.
- For most "box" storage containers, a rigid fork and road handlebar
probably does not have to be removed.
For most "case" storage containers, the handlebar always has to be removed, but most rigid forks do not have to be removed.
For most "case" storage containers, for suspension bikes (like mountain bikes) the front fork almost always needs to be removed. - IF Necessary, Remove Stem and set aside. Stem removal from steer tube
usually drops the fork.
Mind the Fork. Wipe off any grease (reapply a small dollop at destination). - Set the fork aside if it has separated.
- Mind the brake cable, IF attached. Tighten or bag loose bolts.
- Capture and maintain any spacer/nut order integrity.
- Wipe off any stem grease. Store handlebar in storage bag/wrap, IF such exists. Store fork in storage bag/wrap.
- IF crank is on the bike AND is to remain on the bike, THEN Velcro Strap one of the Crank Arms to the bike frame (usually the right side).
- If the Frame comes apart and needs to come apart for packing purpose, perform the task now.
- IF the bike has disk brake rotors AND they need to be removed,
THEN remove them. Usually, rotors are the same size and are interchangeable,
IF rotor position matters (front to front, rear to rear),
THEN pre-indicate front or rear.
 WARNING: Because of the horror stories about bent rotors we always
remove our rotors. We have never had a brake problem with a disk brake
but we did have a problem with a shoe caliper system once BUT only because the
wheel axel was mounted slightly out of line in the front dropouts.
Put rotors into plastic bag and then into a Rotor Carrier
(like a bubble wrapped large mailing envelop). The rotors must be protected
from any bending/stress/pressure.
 - Remove remaining frame (if in a bike stand)
- Put pre-marked covers and marked bags on all bicycle components.
- Assemble and account for all tools. Put tools together in one location and bag, if possible.
- Clean hands with handiwipe/cleaner material.
- Wipe bike parts and frame from oil/grease/dirt smears.
- ALWAYS, ALWAYS, ALWAYS Thank your Partner!!!
Case/Box/Storage/Carrier Component Packing/Placement:
First: Protect the Component Pieces (wrap or bag them in insulated/thick material) and assemble them for packing.
-
Box Packing:
- Place/Mount the frame first. [Typically the frame will have the crank and rear derailer still mounted, narrow seat still mounted but seat mast lowered and water cages still attached (maybe with empty water bottles). The front wheel is nearly always removed but the rear wheel may or may not be removed.]
- Use frame/tube balistic nylon covered insulated wraps with velcro fastener (the best), wash-cloth, or cloth shop towel type wraps (with duct tape) in order to protect the bike and bike components (not already in a protective fleece bag). Bubble wrap is an alternative.
- Usually there is one or two gross weight limits (including the box and packing material). You must know these beforehand (and weight limits are associated with a total box linear length or set dimension). One weight break-point/limit is often around/approximately 35 pounds (actually anywhere from 30 to 40 pounds) and the other weight limit is usually at 50 pounds. Typically, only road or road race type bikes (with hardly any accoutrements) can weigh-in near or less than 35 pound break-weight limit (including the pacing box).
- IF the bicycle box is to remain under the near 35 pound break point, THEN some gear may be packed in the cyclist's travel luggage.
- IF the bicycle box is to remain under 50 pounds, THEN some gear will be packed in the bike box, up to about 48~49 pounds. Then the remaining gear will likely be packed into the cyclist's travel luggage. Typically, it is advantageous to pack big bulky items in the box with the bike (like helmets, water bottles, racks, fenders, ...), versus, small and/or heavy items.
- Place/Mount the frame first. [Typically, all components will be removed from the frame, including crank, water bottle cages, seat, and derailer.]
- Pack larger bike components/items before smaller items. Often a packer must interweave component pieces a few items, especially when racks and suspension forks are involved.
- At first leave items loose, but when the big pieces appear to be in a secure position, tie/wrap the straps as necessary (currently Velcro cloth straps are the best ties for protection and security, but some people use plastic zip ties). Usually three or four straps in key places will secure the bike components from slipping around during shipping and just as important, Also, three or four straps allows an inspector to pick up the unit or to probe around without upsetting the packing integrity.
- Allow NO Metal on Metal rubbing: Check Ties and Bags.
- Place loose cables in a circular pattern to the outside edge of the case. Don't allow a cable to get caught in the case lips when inspecting or closing the case.
- Check total case weight not to exceed 50 pounds (a typical maximum weight before a much increased fare.)
- If two cases are needed, the Second case is for wheels and other remaining small components.
- IF the bicycle case(s) is/are to remain under 50 pounds, THEN some gear will be packed in the bike case, up to about 48~49 pounds. The remaining gear will likely be packed into the cyclist's travel luggage (which is sometimes a duffle bag, which, in turn may be carried in a bike trailer once one is on tour).
- The shipping box/case should have your name and address on the inside and the outside. Validate.
- Double check for component snugness and security. Velcro straps should already have been installed such that the main frame does not slide around loosely and such that the main components can be lifted by an inspector as a unit, felt underneath and then returned back to proper position without a major components scramble occurring. Validate.
- Cables and cloth bags should be fully inside the box/case and not where they may be pinched. Validate.
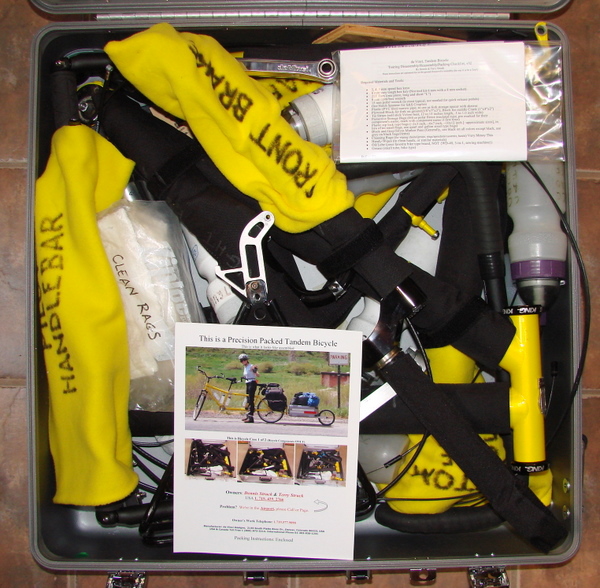
Go to the Bicycle Shipping-Ownership and Itinerary Document Explanation and Creation Page Sections. - Place the "Bicycle Ownership-Shipping Document" (pictured to the above-right) where it will be the first thing that an inspector will see/find. This action significantly reduces the risk of long inspections (with or without the owner being present) and thusly reduces the probable length of box/case open time. The longer a box/case is open, the higher the incidence of lost parts, missing, or damaged components. All cases carrying bicycles get inspected - expect it! Remember to make your own document. Validate Document Placement.
Go to Item #1 of the Bicycle Shipping-Ownership Document Explanation and Creation Page Section. - Place the "Bicycle Disassembly-Assembly Checklist" (this checklist) in a clear protective waterproof cover (one gallon zipper type plastic bag works well) and set it where it will be the second thing that an inspector sees. Validate.
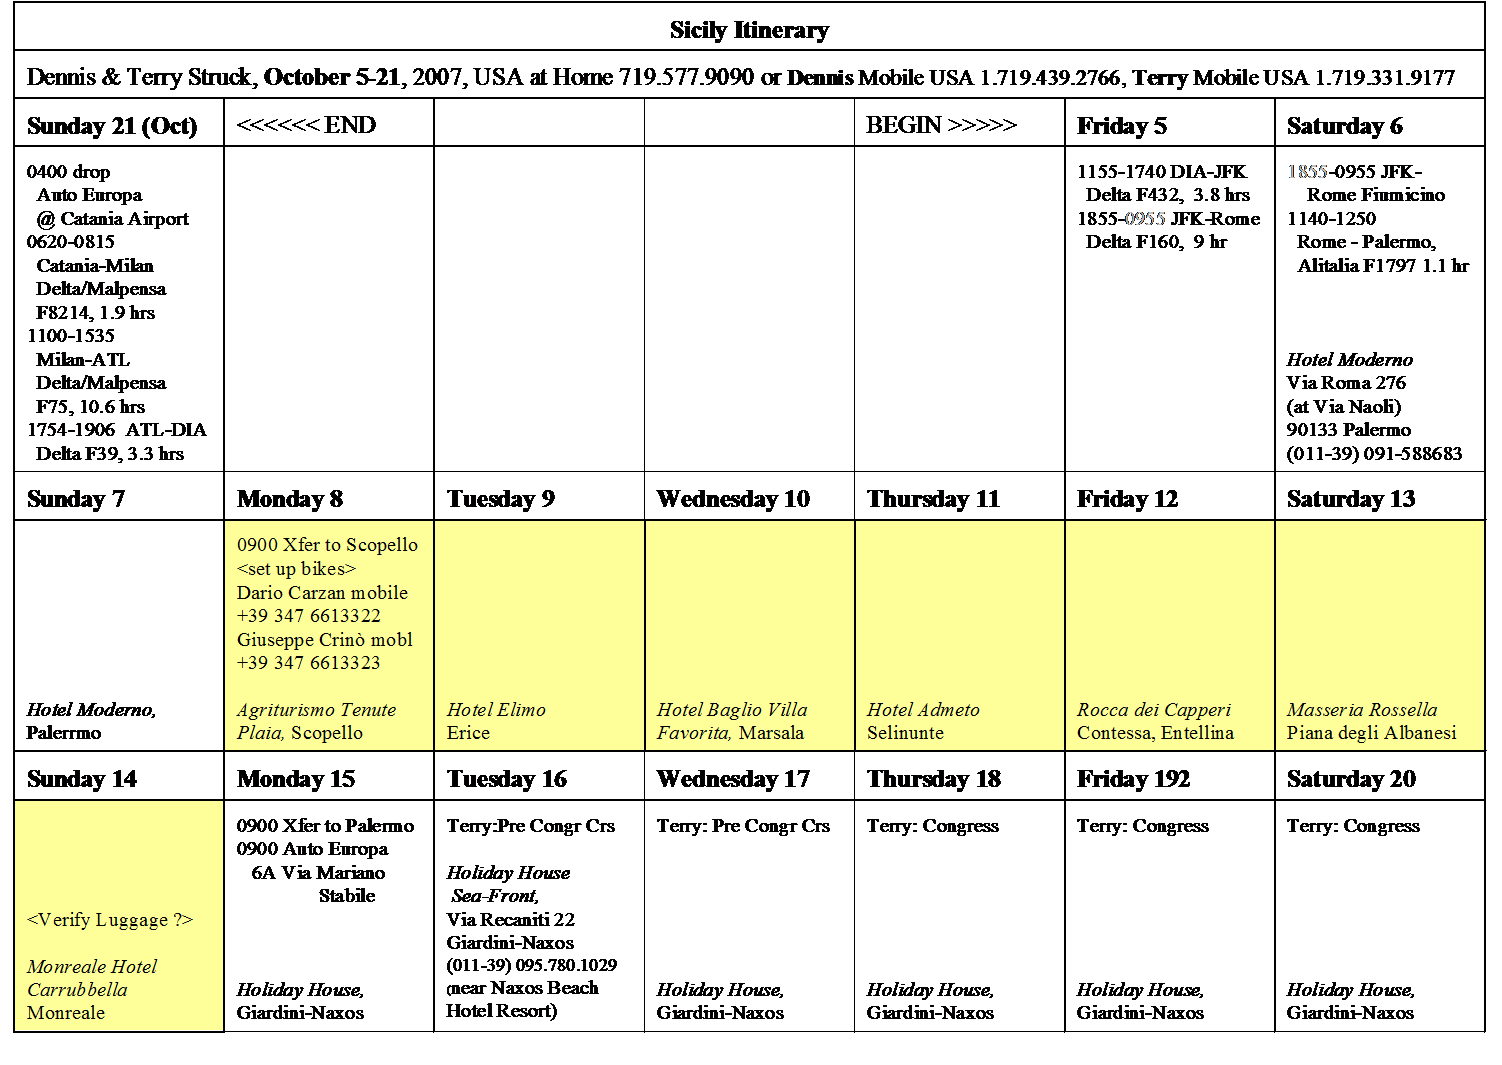
Print this Page and place in shipping container. By the way, it's OK to copy this page and modify it to your needs. We are always improving our pages and packing techniques and expect the same from our readers. Please keep us advised. If you copy this, please add a recognition statement (somewhere) about the original source material - Thanks. - Place a copy of the "One page [Summary] Itinerary" inside the box/case. It is usually placed to the back side of the "Ownership Document" and it contains dates, nightly addresses, and telephone numbers. This action is conducted so that your luggage can find you in case of separation - it happens, be prepared. Validate. The Reason for Performing this Act is IMPORTANT - It allows for your lost shipment to find you. We have had lost luggage and it has found us, also itineraries give Security Inspectors some degree of comfort.
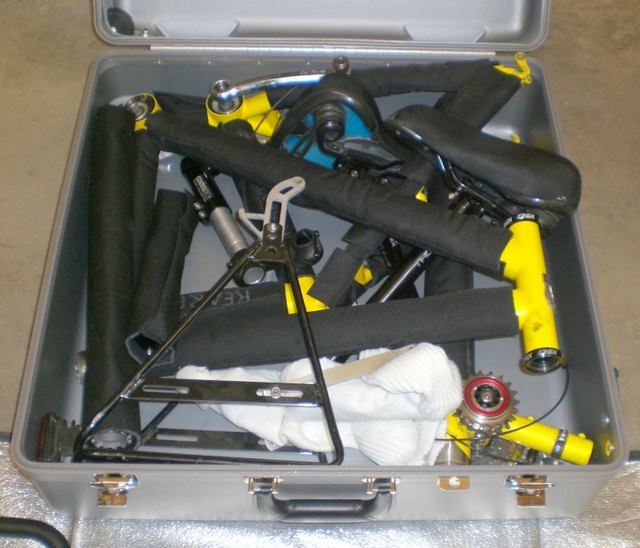
Go to Item #3, the Bicycle Itinerary Document Explanation and Creation Page (Section). - Optional: Place a Large Photograph of the 'Final Packed Bicycle Contents' inside the box/case. It is often placed to the inside or back side of the Bicycle Disassembly-Assembly Checklist. This action helps the inspector and the owner with packing or re-packing.
STORY: We did not originally do this, but we just happened to take a picture of a packed suitcase and we just happened to throw in a printout of the final packing and it turned out to be a new and improved packing technique that we could only duplicate by looking at the final picture - Our unwitting process has saved from moments of stress and anxiety while packing late at night in a very tired state. Make your own pictures. - If the bicycle is to be assembled at a public area, find an out of the way location and lay down the plastic sheet. If the bicycle is to be assembled in a private residence or lodging establishment, let the owner know and ask for the best or preferred area for assembly - you will be surprised at how many times you will be shown the owners person garage or shed (with tools). Leaving someone around one's tools demonstrates a high degree of trust. Only rarely, will the bike assembly be performed in a hotel/motel bedroom. On very rare occasions, you will get the use of a bicycle stand.
- Find and layout the necessary tools, lubricants, thread lock, rags, and cleaner. Nine-tenths of the work will be done with three hex keys (3, 4, and 5 mm). If there is a partner, it is worth having extra metric hex keys.
- Unwrap or uncase the components. If there are two people, designate one person as the Builder and the other as the Partner. Let the partner perform this task. Eventually all of the wraps will gathered into one storage container and all of the little bags usually end up stored in the biggest bag.
- Builder: Start with the frame. Assemble frame, if in segments. When connecting the couplers, assure that the cable brackets are properly aligned with the cable paths.
- Partner: If disk brakes, mount the rotors to the wheel(s). Always tighten multiple bolts in a star pattern, in increments (of torque).
- Either: Remove fork spreader (if used). Loosely place skewers into the correct wheels.
- Builder: Mount the fork, maintain spacer integrity. Attach the handlebar stem to the fork's steer tube. Once the fork is mounted, set the frame upright on small plywood block (for alignment purposes).
- Builder: Mount the handlebar (oil on bolts, yes; oil on handlebar, never). Use pre marked indicators to true the bar (or spend more time truing the settings).
- Builder: Align handlebar, stem, and fork, for steering. Tighten bolts.
- Either/Both: If necessary, mount the fenders and racks. Often fenders and racks need to be mounted before the wheels can be mounted.
- Both: Mount the wheels. Simultaneously minding brake pad fitting, skewer setting, dropout placement, loose cables, and possibly other accessories (like a speedometer sensor). Wheel axel/skewers do not have to be run fully up the dropout opening. Sometimes there will not be a perfect 90° alignment from dropout opening to dropout opening. Some bike dropouts come from the factory a little off perfect alignment; sometimes the dropouts lose their alignment through normal bicycle handling. Sometimes it is proper to run the axel/skewer to only one dropout end and then lock down the skewer, maintaining a 90° angle. This is also a good reason to ship wheel forks with spacers between the dropouts.
- On the rear wheel, IF the drive chain does NOT have any quick links, THEN wrap the chain around the smallest rear and front sprocket rings - so as to mount the chain.
- TEST: After clamping down the axel mount skewer, give both wheels a test spin for roundness and brake rub. Address any issues. At least 50% of the time, a wheel will need to be refitted (usually the front). NOTE: whenever there is a new brake vibration, check that the wheel is mounted correctly, first (9 of 10 times, a wheel remount makes the brake vibration go away).
- Builder: Mount rear derailer. Grease the derailer mounting bolt. Mind the overall fitting, especially the stop for the 'B' Screw (Body Adjustment). Usually rear derailers hold their 'H' and 'L' settings very well for shipping. RIDE SYMPTOM: If the bike has a difficult time getting into the High Rear Drive Sprocket (the Smallest Ring) from any front ring setting, then the Rear Derailer Mount is the first suspect - Adjust the derailer (loosen and retighten the main fitting bolt) so there is no gap between the 'B' screw and the frame's/derailer's screw stop - Usually, the 'B' screw does not need to be adjusted, in fact, most bikes' 'B' screw settings will last the derailer's lifetime.
- Builder: This bicycle assembly work can be stressful. Take a deep breath. Throw a serious compliment to your Partner for putting up with yourself.
- Builder: IF necessary, mount or free the crank or crank arm on the Right Side. Mind the chain connection if the chain must be connected also, connect the chain.
- Builder: Thread the chain through the front and rear derailer cage and rear derailer pulleys. Some cages are open to chain removal, some are fully closed. This is a process to mind, but if it is done incorrectly, it's easy to identify and fix. Typical errors are threading over a cage's brace or not threading inside the cage opening. In any case, one pedal rotation will reveal that attention is needed on the chain connection or threading.
- Partner: Connect Brake(s) and Shifter Cable(s), from rear first toward the front. Remember that in the USA the default is for the front brake to connect to the left brake lever (opposite in Europe and for Motorcycle Riders). If a front disk brake exists, very often two people may [need to] work together in order to more easily assembly (where one person may hold the brake arm up or as closed/tight as practical while the other person sets the wire through the brake barrel and lock ring). Sometimes the rear brake cable cannot be easily connected until the builder is ready to move the bike from resting on its left side to its right side.
- Builder: IF necessary, move the bike from its left side to its right side.
- Partner: IF needed, finish connecting brake and connector cables.
- Partner: Mount the pedals. Mind the left and right pedal bolt threading. The Left pedal has a Left Hand thread, the Right pedal has a Right Hand thread. Some bikes use quick connects for pedals.
- Builder: Perform a chain rotation. Adjust, fix, or address any issues.
- Builder: Test the brakes. Adjust, if necessary. Sometimes a wheel remount will fix odd brake rubbing. Sometimes barrel adjustments are necessitated, however, the need for a big adjustment may indicated that a cable is not seated correctly somewhere in its run. Check the entire system to include verifying that the brake pads and mounts are secure.
- Builder: If the racks and/or fenders have not been mounted yet, do so now.
- Builder: Recheck, front wheel and steering alignment. Validate that stem and steer tube bolts are to tightness specification. Validate that the fork's steer tube is secure in the head tube and meets tightness specifications (virtually no up/down or sideways movement). Check that the wheel skewers or axels are securely, safely, and properly mounted to specs. Generally skewer camlock levers are pointed toward the rear of the bike (to avoid catching on sticks and bushes) but the actual angle is NOT as important as insuring that the skewer's camlock lever is full down without resting on anything (like a rack tube or mounting bolt head). Sometimes when pannier racks are on the bike, there may not be any way to lock the skewer lever except downward or forward (a common touring issue and solution).
- Builder: Mount the seats. This may or may not involve a seat mast mounting. IF the seat post was previously wiped clean THEN add a thin layer of fresh grease (to the seat post). Much time and frustration is saved if the seat and post is pre marked for their desired position settings.
- Partner: Add bottle cage(s) and possibly a tire pump mount. This is often a good time to fill water bottles too.
- Builder: Mount the handlebar attachments (bag, light-bar, light(s), travel computer, bell, ...).
- Either: Top off tire air pressure. Mount/store the pump.
- Builder: Mount all bags (saddlebags, map-case, tool, rack-top, frame, ...).
- Either: Mount tail light(s) and test all lights. Adjust/fix as necessary.
- Partner: If there is a trailer, then assemble the trailer.
- When applicable, assemble (by the trailers specification).
- Lubricate wheel axel and tongue mating points.
- Validate wheel assembly, mount, and condition.
- Top off wheel air pressure, as appropriate.
- Attach any paraphernalia (bottle cages, bottom cushion, straps, flag, markers, ...).
- Both: Look over the entire bike for anything amiss (Trailer too). Look at the ground/floor for any remaining items. Look over the checklist. Resolve any issues.
- Take the bike to an outdoor test ride area, specifically Check/Test:
- Brakes (brake hard, both together and separately). No headers allowed.
- Steering, seat, and human alignment and tightness. No loose handlebars or stems allowed.
- Handling, this is one time where the bike is deliberately handled roughly, especially testing seat and handlebar integrity, perform a slight wheelie maneuver (safely jerk the front wheel off the ground), stand on the pedals and apply full weight/pressure to the pedals. Steer abruptly.
- Shifting, test full range. No need to be rough.
- IF there is a trailer, conclude the test ride by pulling the trailer. Affirm that trailer mount/connection is secure and that the trailer integrity is OK. Perform a hard brake test and left and right leaning tests.
- Collect all tools and place in tool bag/kit.
- Clean the work area, put things away (in their appropriate place)
- Clean bike, trailer, and self (selves).
- Bike and trailer storage locations vary. Most often the panniers are removed from the bike and brought inside the place of stay. The bike is locked up/secured, often in a maintenance shed, utility room, or onto some outside safe structure. The trailer is usually brought into the room of stay, unless flights of stairs are involved.
- IF there is a Partner, THEN give Thanks!
- Take a break. Start Tour Packing. Enjoy Life.
Final Shipping Validation and Suggested Documentation:
- These are the final packing issues to address:
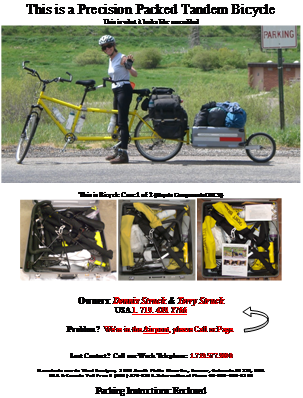


The following link details the Final Documentation (How and Why): Go to Bicycle Shipping-Ownership and Itinerary Document Explanation and Creation Page (same links as just above here).
Bicycle Assembly:
Philosophy: As most assembly work is performed without a stand, basically the bike will be assembled on its side on top of a plastic sheet, in which case the best first objectives are to get the fork/handlebar mounted and the wheels mounted, and then address the drive train and remaining peripherals.
Warning: Always Inspect and Test the Brake System Integrity more than once
before riding.
While other things can go wrong, this issue is probably the highest risk
with the biggest negative consequence.
Lubrication: Place a drop of oil on small or fine threads (unless it the bolt is a thread lock candidate). Thinly grease large or course threads. Be sure to grease pedal stems/bolts, handlebar stems, seat posts, rear derailer mounting bolt, upper head of fork / steer tube. Lubricate the chain and wipe it clean of excess before starting a tour. No grease or lube the handlebar mount or handlebar stem mount. No lube or finger touching of brake pads, rims, or rotors - If done by mistake, clean with alcohol or similar oil removing compound.
